How to create a Windows 10/11 USB recovery drive
- Tech Ray

- Nov 9, 2022
- 2 min read
Updated: Nov 16, 2022

Computer manufacturers rarely ship recovery CD's or USB drives these days. Unfortunately, most people don't create their own USB recovery drive before disaster strikes, and are left with very few options when it does. In this article, I will teach you how to create your own Windows 10 or Windows 11 USB recovery drive. After you create it, you can use it to recover or restore your computer when Windows will no longer boot or if you forgot your password.
What you'll need:
-A working Windows 10/11 computer with internet access
-A blank USB thumb drive (must be at least 8 GB capacity)
How to create the USB recovery drive:
First, you'll need to download either the Windows 10 or Windows 11 media creation tool. The version of the tool you download depends on the version of Windows you're running on your computer. Download the tool using the link that matches your Windows version below.
Windows 10: https://go.microsoft.com/fwlink/?LinkId=691209
Windows 11: https://go.microsoft.com/fwlink/?linkid=2156295
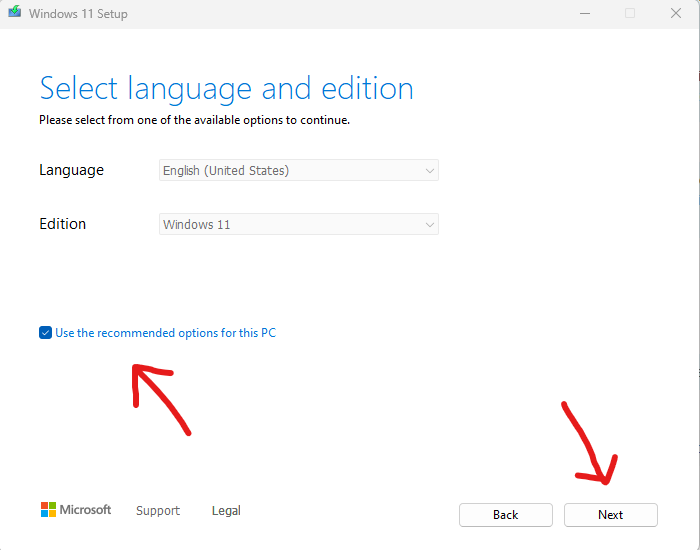
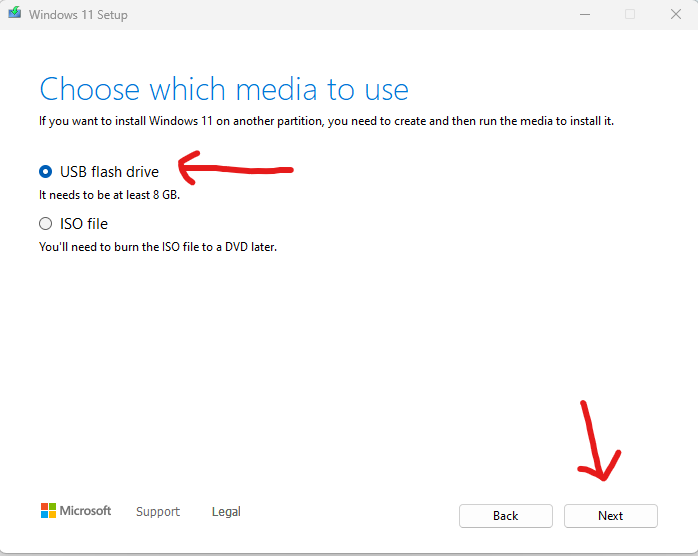
After you download the tool using one of the links above, click on the file you download to launch the tool. Also, now would be a good time to insert the blank USB drive into your computer.


Click the 'Next' button after the tool says it successfully completed. The tool will go through a cleanup phase and exit. That's it! You now have a Windows recovery USB.
If you ever need to use the recovery USB drive, you can insert it into your computer, power your computer on, and press the 'F' key (example F1, F2, F3, etc...) that allows your computer to change the boot order or select a boot device. Change the order so the USB drive boots first, or select the USB drive to boot from. You can either select the option to 'Repair your computer' or 'Install Windows'.
Blog written by: RemoteHero.net - Affordable Expert Computer Repair & Technical Support | Prices start at only $10 per session | Don't Delay, Book Today!


Comments